Watch4Net
Watch4net#
Overview#
The ML Pack for Watch4Net automatically monitors your existing Watch4net instance metrics.
Configuration#
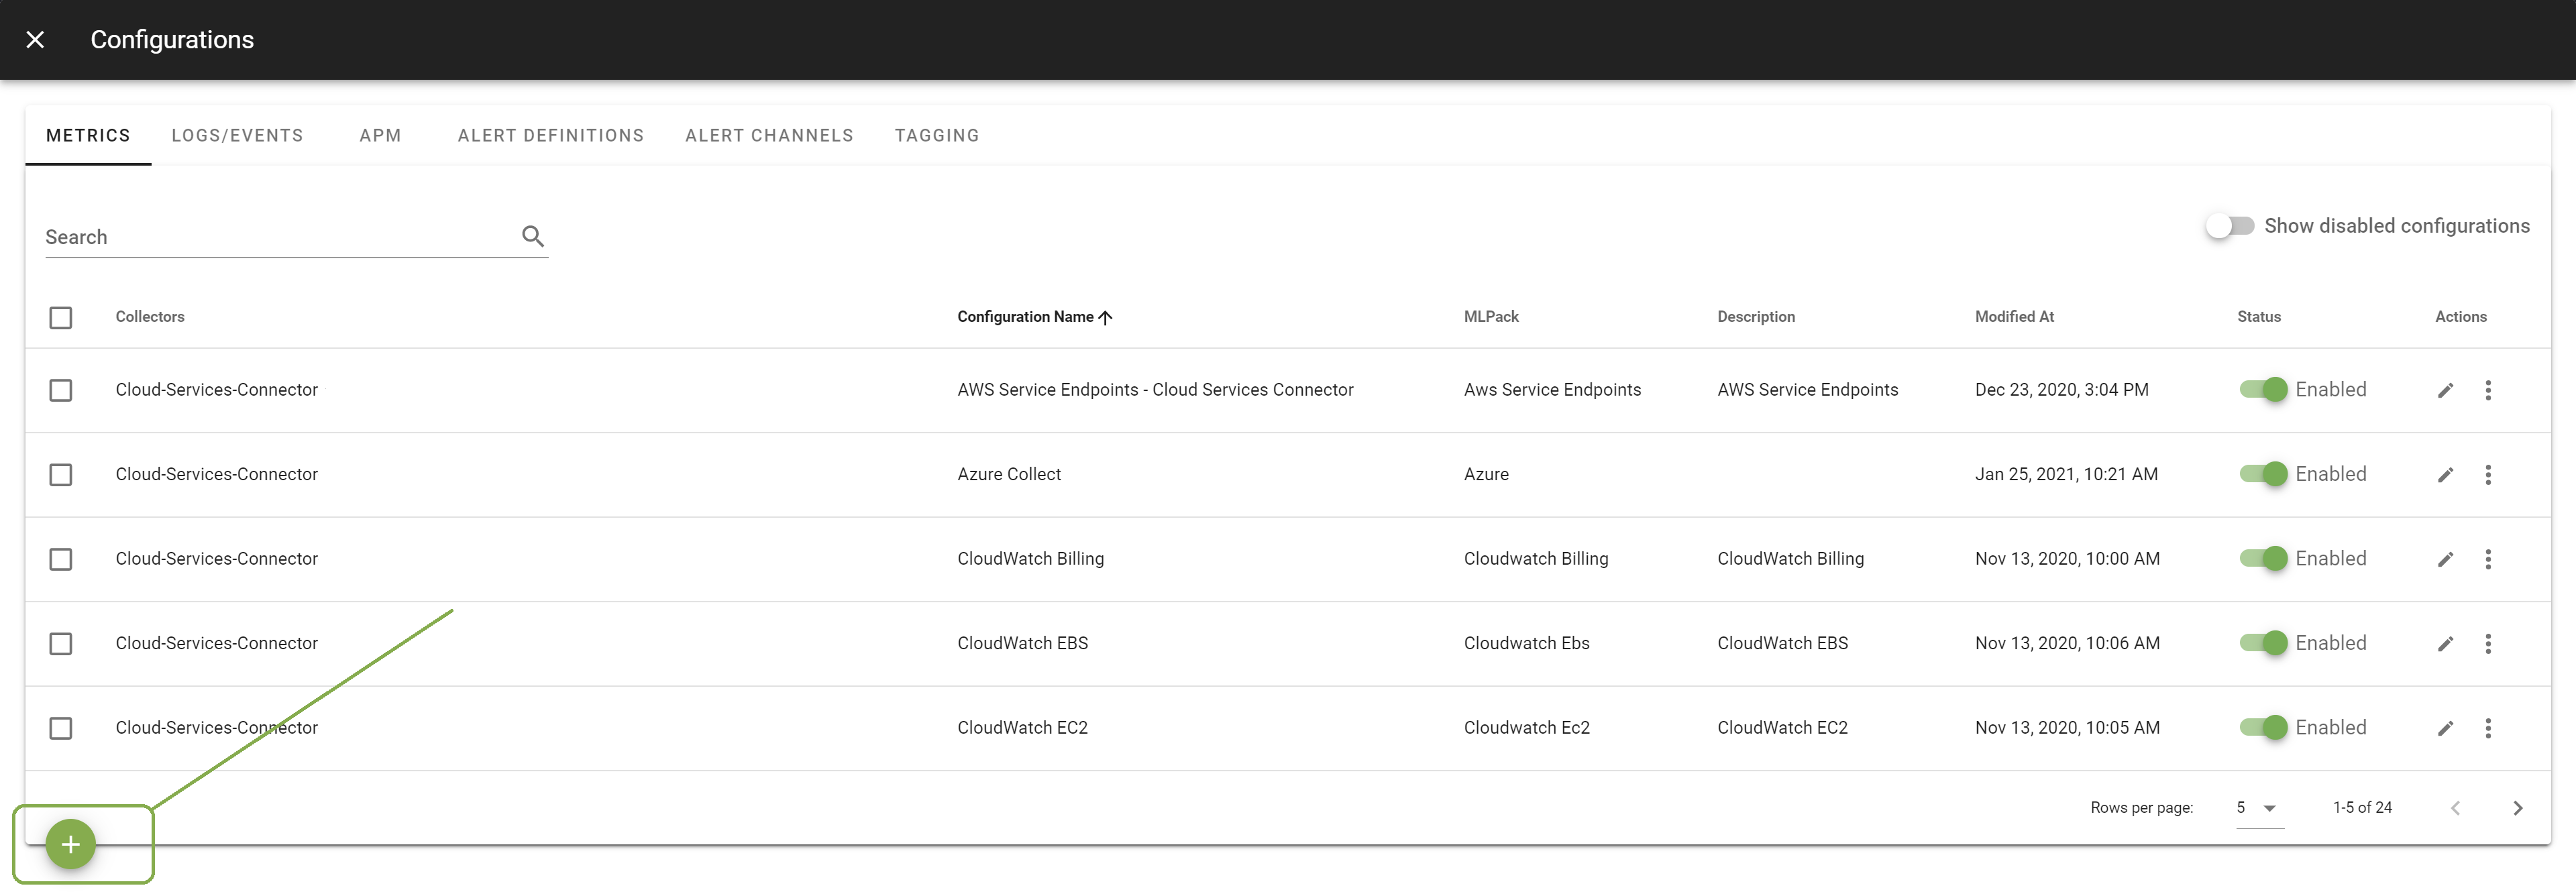
Go in Configuration Management.

Click on the + button to add a new configuration.
Select the template Watch4net. Select the Collector on which you want this configuration to be deployed; and provide a Configuration Name that is meaningful for you. The Description is optional.
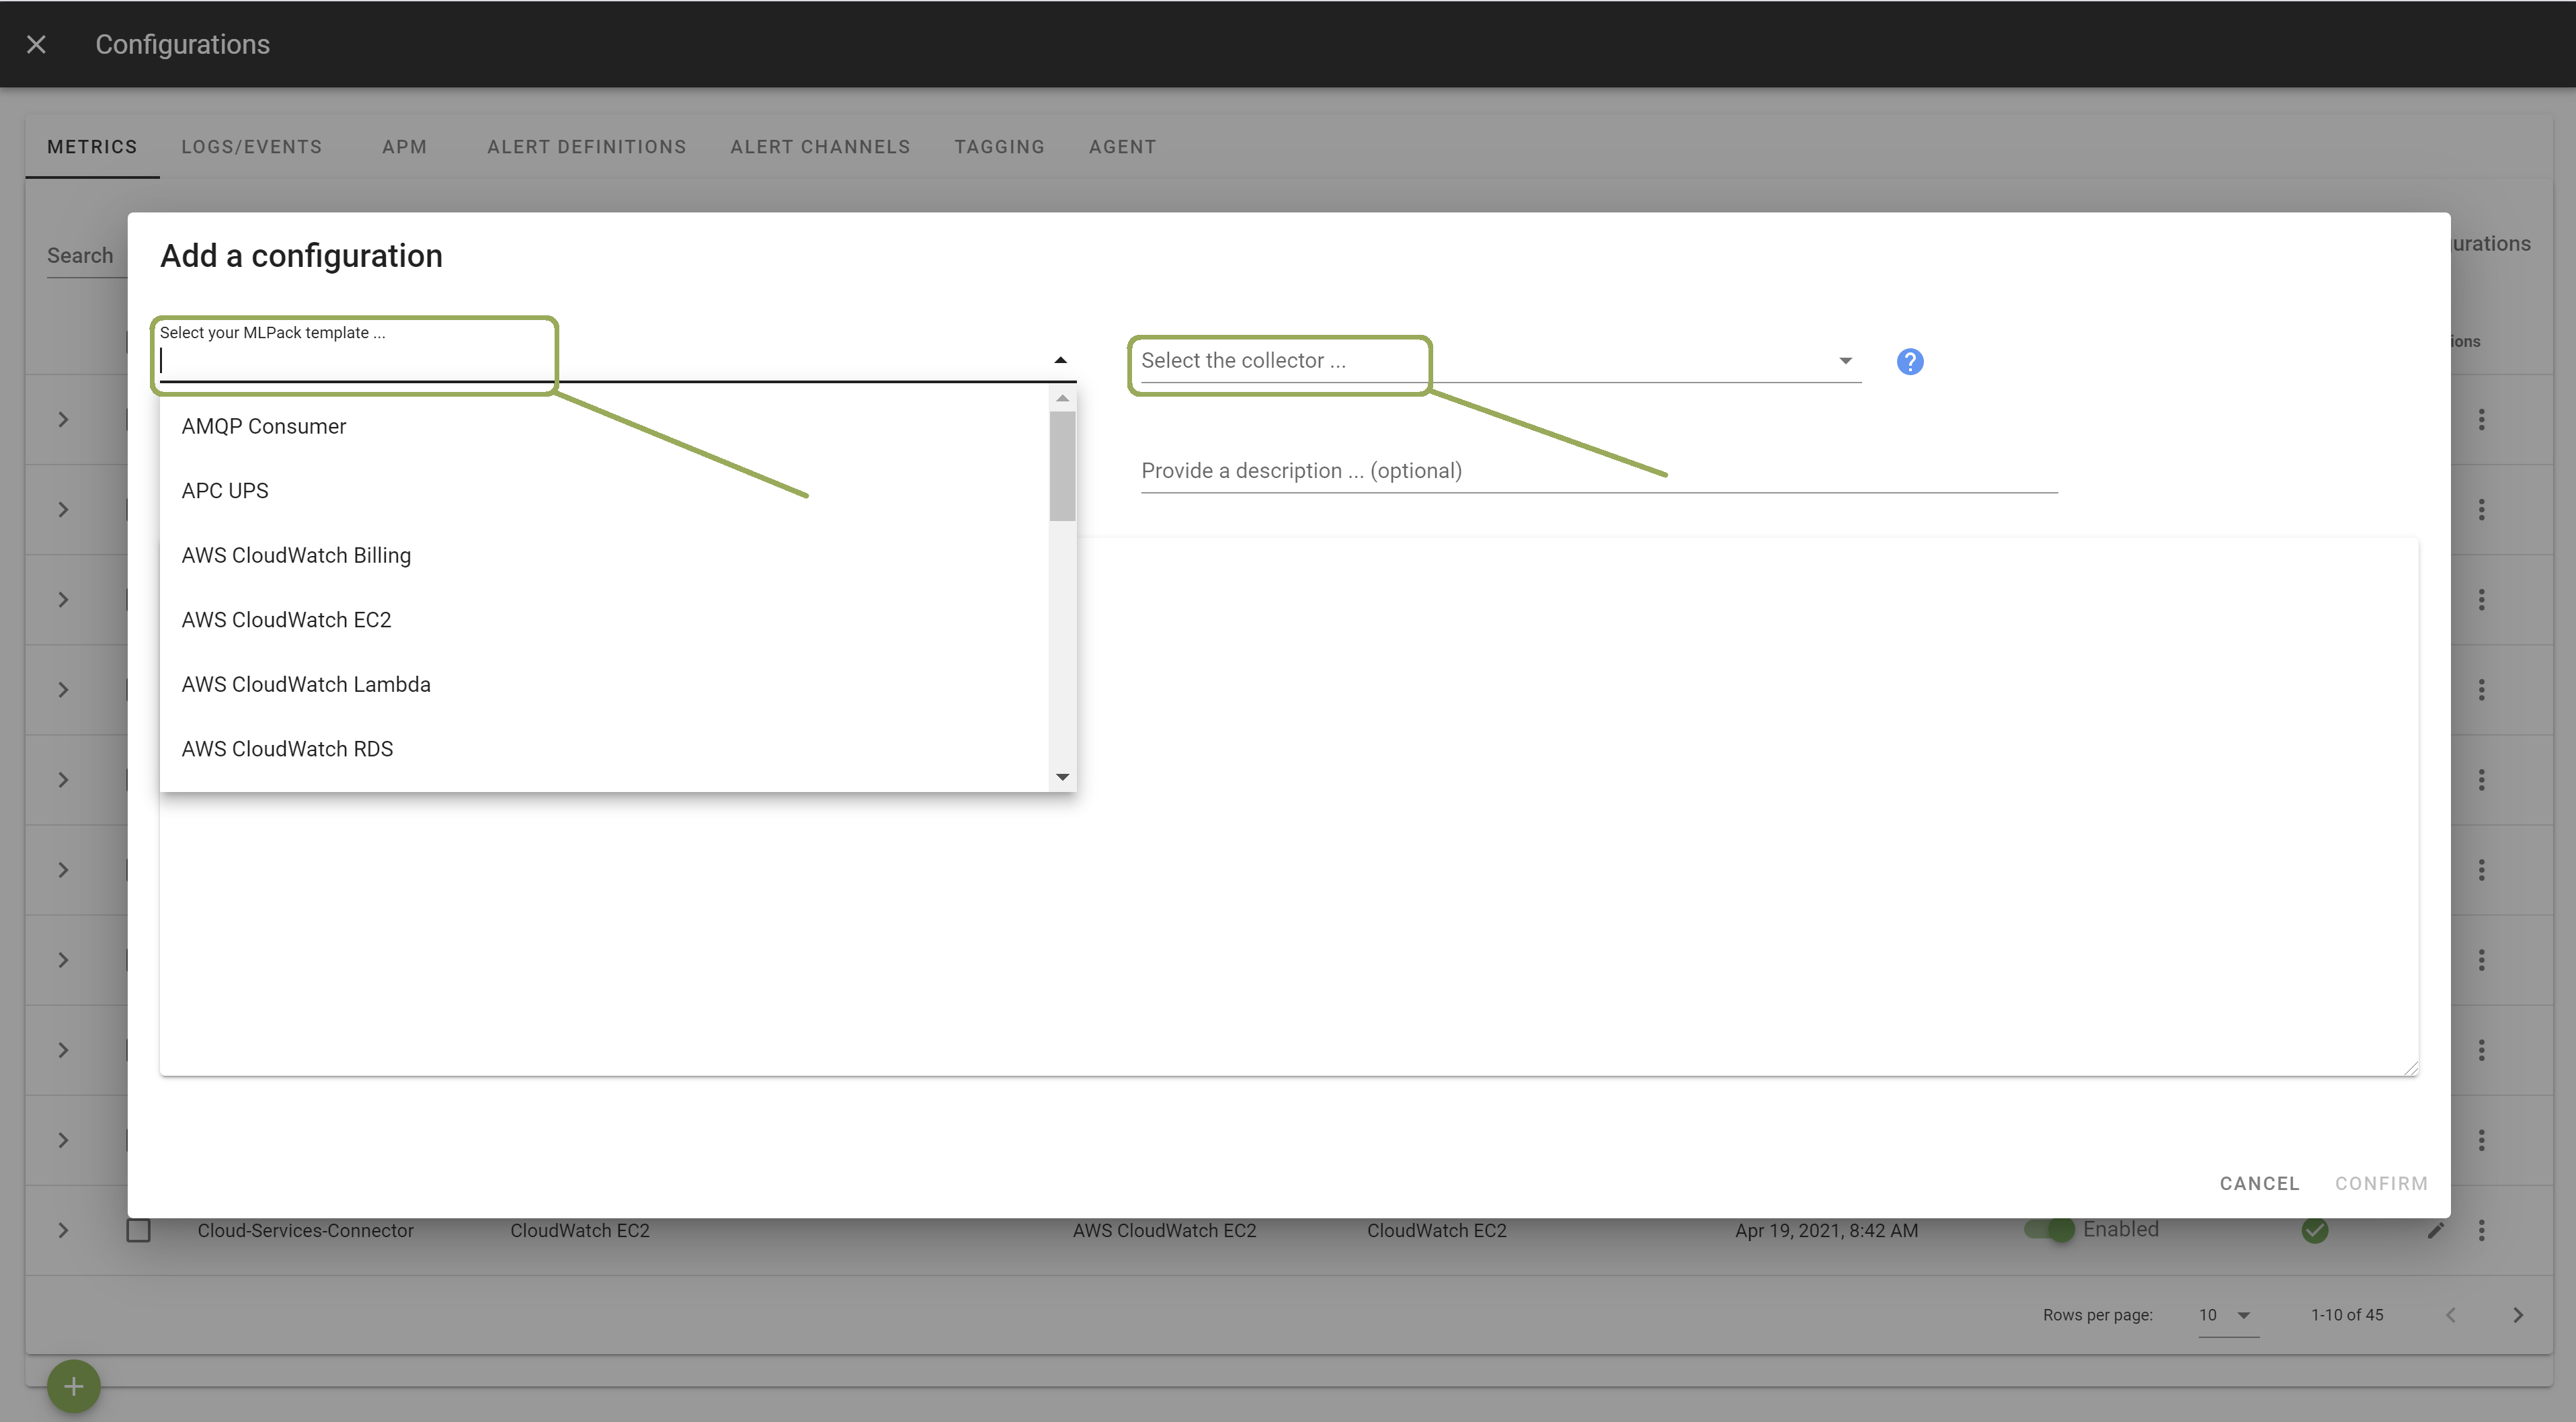
You can review the default configuration from this file, but everything is configured with the best practice settings.
Once done, click Apply. Your Unryo collector will start listening for the incoming Watch4net data stream.
You can now configure Watch4net based products to send their metrics to the collector.
Typically in Watch4net here the steps:
- In SRM or Watch4net UI, go in Administration --> System Admin --> Servers (Normally https://10.128.5.21:58443/admin/#/system/overview/servers?)
- If you Watch4net deployment is multi-server, click the server where your load-balancer service is running
- Once on that server, locate the service instance named "Load-Balancer" and click on this row to drill-down
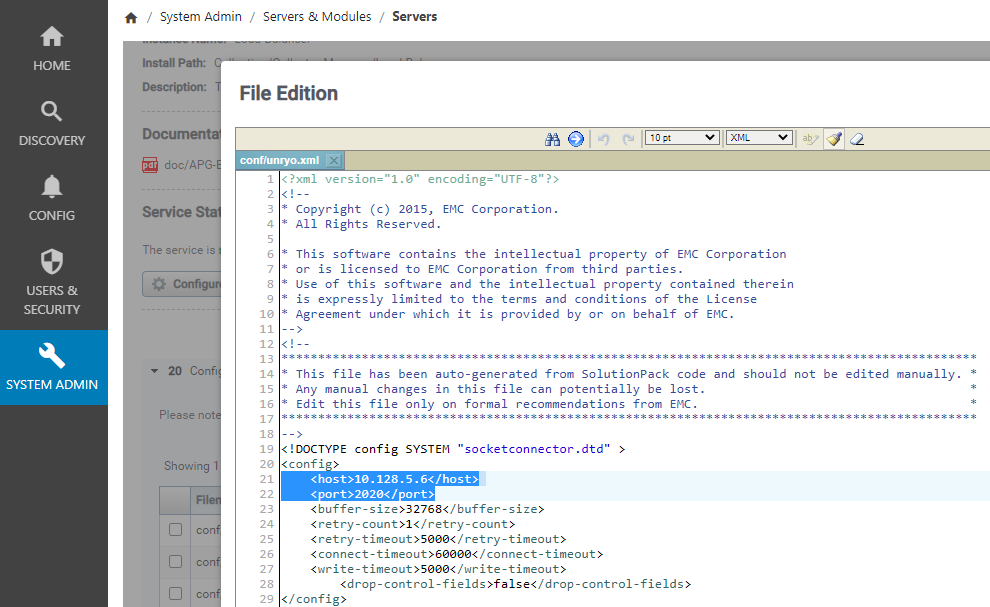
- use the topoconnector.xml or another socket-connector configuration file as a template and using your own editor, create a file called unryo.xml. In that file, you must specify the IP address of your unryo tscollector, and the tcp port you have configured in Unryo. Our default is port 2020. Here a good example of configuration file:
 - Now in APG, use in that screen the button "upload file" to send your unryo.xml file to your APG server
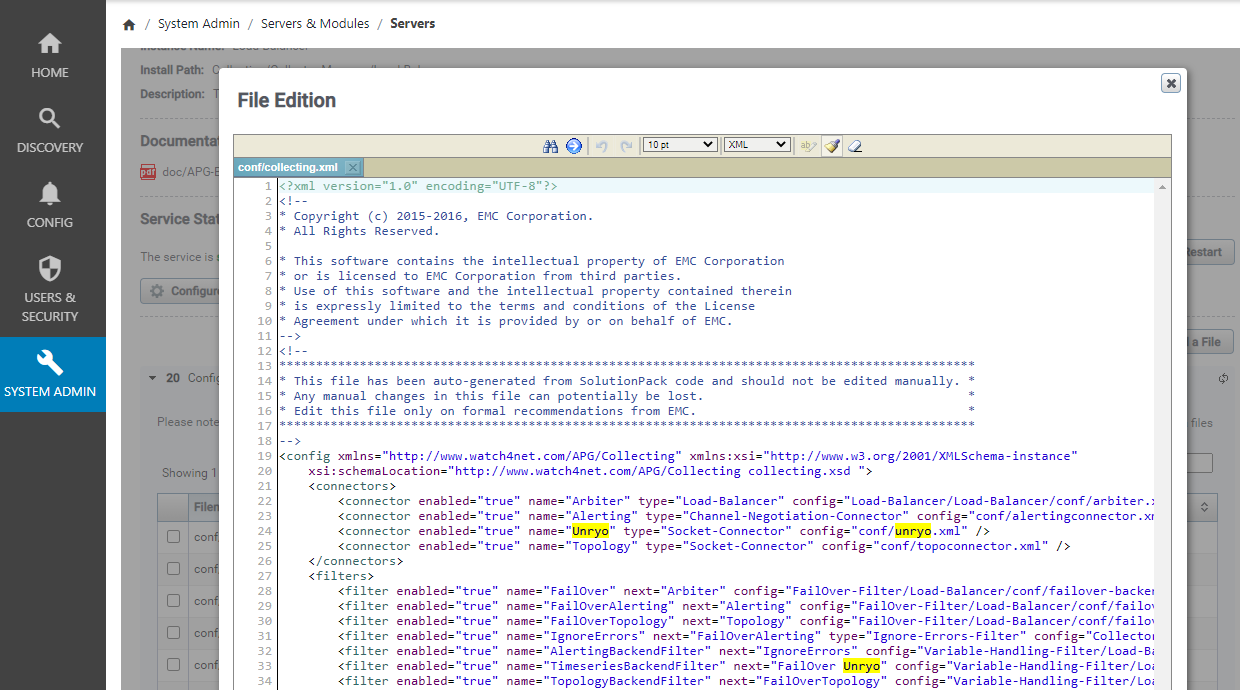
- The last step is to edit the collecting.xml to connect that new unryo target. Here a good example:
- Now in APG, use in that screen the button "upload file" to send your unryo.xml file to your APG server
- The last step is to edit the collecting.xml to connect that new unryo target. Here a good example:
 - And now just restart the Load-Balancer service using the "Restart" button directly on that APG screen. Follow your Load-Balancer logs to validate your configuration is compliant